Friday, December 23, 2011

Thick and Chewy Classic Chocolate Chip Cookies Recipe

If you're looking for something to bake, here is my favorite classic chocolate chip cookie recipe. It turns out slightly crispy on the outside but soft and chewy inside. Yummy goodness. If I have time tomorrow, I may bake a fresh batch for our Christmas Eve dinner. 


Thick and Chewy Classic Chocolate Chip Cookies:
Adapted from America's Test Kitchen


Ingredients:
  • 2 cups plus 2 tbsp all-purpose flour
  • 1/2 tsp baking soda
  • 1/2 salt
  • 1 1/2 sticks (12 tbsp) unsalted butter, melted and cooled
  • 1 cup packed light brown sugar
  • 1/2 cup granulated sugar
  • 1 large egg plus 1 yolk
  • 2 tsp vanilla extract
  • 1 1/2 cups semisweet chocolate chips
  • Optional: Any ingredients or combination of toppings you want to add.
Step 1: Pre-heat over to 325 degrees. Line two cookie sheets with parchment paper. Mix dry ingredients together in a medium bowl and set aside. 


Step 2: In a large bow, mix butter and sugars together until thoroughly combined by hand or with an electric mix on medium speed until smooth (1 to 2 minutes). I usually just mix it by hand. Beat in egg, yolk and vanilla until combined (about 30 seconds).


Step 3: Add in dry ingredients and beat a low speed (about 30 seconds) just until combined. Stir in chocolate chips (or whichever toppings you choose). 


Step 4: Roll scant a handful of dough into a ball. Hold dough ball in fingertips of both hands and pull into two equal halves. Place each half with jagged side facing up on cookie sheet. Leave about two inches between each ball. 


Note: dough can be refrigerated up to two days or frozen up to one month. 


Step 5: Bake cookies one sheet at a time reversing position of cookie sheet halfway through baking until cookies are light golden brown and outer edges start to harden yet centers are still soft and puffy. Bake about 15-18 minutes but check starting at 13 minutes. It took exactly 17 minutes in my oven. Frozen dough requires an extra 1-2 minutes to bake.


Step 6: Let the cookies cool on the cookie sheets for about 10 minutes before transferring to wire rack to completely cool. Serve or store in an airtight container.


I was able to make three dozen cookies for a cookie swap. I did one dozen of each of these and stored them in this container to give away.


  • plain chocolate chip


  • chocolate chip and crushed peppermint candy canes 


  • chocolate chip and chopped up Andes Chocolate Mints


  • Cookie Swap Container with Printed Recipe Card:


    I also like making cookies with these toppings. The possibilities are endless. 
    • white chocolate chips with chopped macadamia nuts
    • chocolate chips with nuts (chopped walnuts or pecans)
    • toffee chips
    My husband's favorite are the s'mores version. With about seven minutes left into baking plain chocolate chip cookies, insert small pieces of Hershey's Bar and mini marshmallows. Next time I will try adding rough chopped pieces of graham crackers and see how they turn out.

    Happy baking!

    DIY Salt Dough Handprint Ornament Tutorial

    I've been so busy with shopping and errands that I haven't had a chance to post much. I'm going to try to get all my Holiday-related posts done before Christmas. We still have a few people to buy for but the hard part is figuring out what to get. I might end up baking some cookies or something. Our family always celebrate on Christmas Eve so that cuts down on my remaining shopping time.

    Anyways, I wanted to share all the salt-dough ornaments Gabby and I made last week in case there is anyone that wanted to do some last minute gifts for their family.

    DIY Salt Dough Handprint Ornament (Heart with Gabby's Thumbprint):


    Supplies Needed: 

    • 4 cups of flour
    • 1 cup of salt
    • 1.5 cups of water
    • Rolling pin
    • Cookie cutters
    • Coffee straw or skewer to make the holes for the ornament.
    • Acrylic paint
    • Optional: rubber stamps
    Note: This recipe makes a LOT of dough so you may want to cut the recipe down. I was greedy and used every last piece of dough so we made 50-60 various sized ornaments. It took a long time to roll them all out especially with a curious toddler helping. 

    Step 1: Combine all the ingredients in a large bowl and knead for approximately 10 to 15 minutes until thoroughly combined. This is what ours looked like mid-kneading. Not very pretty at all.

    Salt Dough Mixture:


    Step 2: Scoop out a handful and roll out the dough. Shape into a circle or use cookie cutters to make whatever shape you want. Press down handprint and make a hole or two for the hanger using a straw or skewer. I used a straw and the hole came out clean. I used rubber stamps to imprint letters, numbers and shapes.

    Step 3: Line up ornaments on parchment paper on a cookie sheet and bake at 300 degrees for 20-25 minutes or until golden. I think I slightly undercooked them because they started getting puffy if I baked them too long.

    Step 4: Let air on cookie rack for about a day. You could just leave them on the cookie sheet but flip them back and forth so the back dries too.

    Baked Salt Dough Handprint Ornaments Before Painting (Set 1 of 2):


    Baked Salt Dough Handprint Ornaments Before Painting (Set 2 of 2):


    Step 4: Paint with acrylic paint. You can add glue and glitter if you would like. Hang with a string or ribbon. I painted them using acrylic paint.

    Disclaimer: Sorry the next several pictures turned out so poorly. I usually take my pictures during the day in natural lighting but ran out of time so took these at night with bad lighting. Gabby hung the ornaments on the tree so I don't want to pull them down to take the pictures again. At least you get an idea of what they look like.

    Salt Dough Ornaments with Gabby's Handprint:


    Salt Dough Ornaments with Gabby's Fingerprints:

    Salt Dough Ornaments with Random Cookie Cutters:


    Salt Dough Ornaments Imprinted with Initials for Gifts:

    Failed Salt Dough Ornaments:
    I tried to get fancy and painted on a clear acrylic coating to make them shiny but they dried with this thick cloudy film. Next time, I will try using an acrylic spray paint instead for a thinner and more even coat. I got tired and painted the mitten pretty poorly. Gabby's handprint is on it so I'm keeping it. Maybe I will repaint it later. 


    As you can see, my painting skills really leave something to be desired. You can really tell they are "Do It Yourself" but I am glad we did it. Gabby had a lot of fun helping me. It was a long and messy endeavor but well worth it for the memories.

    My Little Helper with Dough Everywhere Even on Her Face:

    Gabby Deep in Concentration:

    It's time for us to get ready and battle the crowds. Good luck, everyone!  Drive safely out there.

    Tuesday, December 20, 2011

    White Chocolate Covered Oreo Truffle Pops Recipe

    White Chocolate Covered Oreo Truffle Pops:


    Supplies Needed:
    • 1 package Oreos (I use the regular non-double stuffed kind. You can get creative and use Mint Oreos as well).
    • 1 8 oz. package cream cheese softened (I use Philadelphia Cream Cheese).
    • Almond bark, chocolate bark or candy melts (see previous post for the CandiQuik brand I use).
    • Optional: Food processor or Magic Bullet.
    • Optional: sprinkles, nuts or other toppings of your choice.
    Step 1: Leave cream cheese out to soften. Finely crush Oreos (filling and cookie together) in food processor or Magic Bullet and place in a medium bowl. Another option is to place the Oreos in a large Ziploc bag and finely crush them with a rolling pin or smash them with something heavy. Make sure all the chunks are gone. 

    Step 2:  Add in the cream cheese and thoroughly combine with the Oreos using your hands. I usually put on plastic gloves but that is optional. The resulting batter should look shiny with no white spots from the cream cheese.

    Step 3: Form one inch balls and place on parchment paper. Let freeze for about 20 to 30 minutes. 

    Step 4: Melt chocolate as directed on the package. Take 2-3 Oreo balls out of the freezer at a time to dip. If you take out too many, they will start to soften. Add sprinkles or other toppings quickly or else the chocolate will harden fairly quickly. Leave on parchment paper to harden. 

    Make sure you store these in the refrigerator because the cream cheese could spoil. 

    Variation (Oreo Pops): You could get fancy and put them on popsicle sticks. To do this, you just need to add one step. After you form the ball, dip a stick in chocolate and insert it into the ball. Place them in the freezer with the sticks already in them. This will help the stick adhere to the pop or else the ball will fall off. Here are the ones I made for Gabby's birthday:


    Variation (Oreo Kisses): Instead of balls, you could also shape them into them into Kisses. These would be fun to do for Valentine's Day. I made these for our friends' engagement party last May. I added a little strip of paper with various sayings and wrapped them in Wilton Foil Candy Wrappers.


    If you are skilled you can shape Oreo Truffle Pops into reindeer, snowmen, Santas, etc. I'm not very artistic so will stick with simple sprinkles or chocolate drizzles. 

    Easy Bake Cookies from Boxed Cake Mix Recipe

    Gabby and I are headed off to a cookie swap and kid craft day soon. I'm excited to see what kind of cookies will be exchanged so we can sample and test out new recipes. I knew I wouldn't have time this morning so after Gabby went to bed last night, I made a small batch of Oreo Truffles and these fast and simple cookies that turned out soft and a little bit on the sweet side.

    Easy Bake Cookies from Boxed Cake Mix Recipe:


    Supplies Needed:
    Step 1: Preheat oven to 350 and line two cookie sheets with parchment paper.

    Step 2: Add eggs and oil to cake mix batter and stir well. 

    Step 3: Use a large spoon to scoop batter onto cookie sheets and bake for approximately 8-9 minutes. 

    Step 4 (Optional): While cookies are still hot out of the oven, add one Hershey Kiss on top and smoosh around with the back of a spoon. Once cookies are completely cool, place in the refrigerator for a few minutes to let the chocolate harden.

    These are handy when you don't have a lot of time or enough ingredients on hand to make chocolate chip cookies or anything too fancy. You may even have a box of cake mix laying around in your cupboard. 

    Here are ones made with no toppings. The Pillsbury Moist Supreme Strawberry Cake Mix is super sweet so I would not recommend adding anything else on them. These are staying at home with me. :)


    I have to run and get us ready for the Cookie Exchange but I'll post the recipe for the Oreo Truffles when we get back. Have a great day, everyone!

    Thursday, December 15, 2011

    DIY Sweet and Salty Caramel Turtles Recipe

    To follow up on my last post, I wanted to share the quick and simple recipe for my Sweet and Salty Caramel Turtles. It will take you less than 15 minutes total and will be sure to be a hit.

    Sweet and Salty Caramel Turtles:


    Here is what you need:

    • A bag of Rolos (found at Target, Walmart or any supermarket). A 12 oz bag contained about 57 pieces.
    • A bag of Snyder's Butter Snaps (you could use mini pretzels as well but the butter snaps have more surface area)
    • Any Topping(s) of your choice. I did cashew nuts, almonds, pistachios and Holiday M&M's.
    • Parchment paper (I use the Reynold's brand because they were on sale for $2.50/roll at the supermarket) 
    Step 1: Preheat your oven to 350 degrees. Line parchment paper on two cookie sheets. 

    Step 2: Unwrap the Rolos and place them on the Butter Snaps. Unwrapping the individual Rolos will take the longest in this whole process. 

    Synder's Butter Snaps & Bag of Rolos:


    Unwrapped Rolos on Butter Snaps Lined Up and Ready for Baking:


    Step 3: Place the cookie tray in the oven for 3-4 minutes until the chocolate starts looking "wet". Try not to overcook or else the chocolate will start burning. I did 3 minutes in my oven and it turned out fine. 

    Step 4: Place a topping on top of the Rolo and push it down. Be careful not to touch the chocolate with your finger.

    Finished Sweet and Salty Caramel Turtles: 


    Step 5: Let it cool. If you are in a rush to leave, you can place them in the refrigerator or freezer. Just remember to serve them at room temperature or else you will be eating hard cold caramel. 

    That's it. You're done! You can place them in individual mini cupcake cups or just toss them in a box like I did. 

    Finished Sweet and Salty Caramel Turtles. I placed them in parchment paper over a sheet of green tissue for a festive look. 


    Gabby checking out the yummy goodness:


    My Little Monkey:


    Wednesday, December 14, 2011

    DIY Christmas White Chocolate Dipped Pretzel Sticks Recipe

    I've been taking Gabby to storytime at the library for awhile now but wanted more opportunities to take Gabby out. There's only so many times you can go to Target or the mall play area. The park is only so much fun by yourself too. So I recently joined a local Mom's group so Gabby can have playdates with other children around our area. She really enjoys being around other kids and I get to have some adult interaction and conversation too. So far, it's been so much fun! There are several events every week so there's always something to do if we wanted. We've done playdates at a gymnastics studio (for free), the park, a craft day at a fellow mom's house with about 15 other kids.

    Tonight I'm going to a kid-free Mom's Night Out and White Elephant Secret Santa Exchange which should be fun! We are going to craft some gift tags and munch on home-made goodies. With Gabby's help this morning, we made about 20 of these babies.

    Christmas White Chocolate Dipped Pretzel Sticks with Holiday Sprinkles:


    Gabby helped crush mini peppermint candy canes for the pretzel sticks on the right. 


    Here is what you need:
    • Pretzel Rods (can be found at Target, Walmart or any supermarket)
    • Almond Bark, Baker's Chocolate or Candy Melts. I used about half a package of almond bark for twenty pretzel rods (see picture below). 
    • Parchment Paper
    • Optional: sprinkles, chopped up nuts or candy, crushed Oreos or whatever you want. This time I didn't add any nuts just in case some people have peanut allergies.
    • Optional: Wilton Pretzel Rod Bags.

    Step 1: Line two cookie sheets with parchment paper. On a large plate, break off and melt two portions of the almond bark in the microwave in 30 second increments. You don't want to overheat the chocolate. 

    Step 2: Roll a pretzel rod on the melted chocolate until it has a thin coating. If you add too much chocolate, it may drip and make your pretzel have a flat bottom instead of a round shape. Cover approximately 2/3rds of the pretzel rod length-wise.

    Step 3: Add on your toppings and let cool on the parchment paper. You can also melt a different color chocolate and drizzle it on for a different look. By the time I was covering the pretzel rods and topping them, the first pretzels had hardened and were ready to be bagged for freshness. 

    Step 4: Place finished pretzel rods in plastic bags or airtight container. The hardest part on this whole project is opening up the plastic bags! You can spice up the packaging by adding ribbon or labels if you wish. So many choices and super easy too. 

    Finished White Chocolate Covered Pretzel Rods:


    I had enough leftover chocolate to cover the broken pretzels for us to sample now, you know, for quality assurance. ;)

    We are planning on making some sweet and salty caramel turtles this afternoon so please check back tomorrow.

    Tuesday, December 13, 2011

    DIY Lego Ornament Tutorial

    The last time I was at Michaels, I picked up a couple of these button buckets from their $1 bin in green and purple. I figure I could always use extra random buttons for crafting projects but really, the little plastic buckets were too cute to resist. They come with a snap on lid and ribbon hanger already attached. I took out the buttons and filled them with random Legos and made an instant DIY Lego ornament for the Christmas tree. Perfect for your fellow Lego enthusiast and collector like my brother.

    DIY Lego Ornament: 


    I picked up a couple of more in blue and white from Walmart also for $1.


    I think I may fill the new ones with a mini figure - maybe a snowboarder, mad scientist or doctor? There are so many cute Lego mini figures. Here's a cute stocking stuffer if you have a police officer friend or family member:

    You can find more on the  Amazon's Lego Store.

    If you have little ones, just make sure you hang the Lego ornament out of their reach. I know Gabby will probably try to eat them.

    Thursday, December 8, 2011

    DIY Felt Christmas Tree Advent Calendar

    Finally done! I spent the last three to four days covered in felt pieces and random thread tidbits. I blame it all on Pinterest. I started out wanting to make Gabby this simple felt Christmas tree that she could play with. Seemed easy enough. Then, I came across this post and had to try it. After many late nights being poked by needles, here is what I came up with. It's a week late for a Christmas advent calendar but Gabby is none the wiser.

    DIY Hand Sewn Felt Christmas Tree Ornaments:


    DIY Hand Sewn Felt Christmas Tree Advent Calendar: 


    Felt is such an easy medium to work with. You can cut it into virtually anything you want. It helps to have a sharp pair of scissors though. I can't seem to find the ones I used but it's made by J.A. Henckels. Here's something similar but mine are a little longer.

    The above picture was taken yesterday on the 7th. I miscalculated and ended up making 25 spots on the tree and 25 ornaments but made only 24 pockets. I didn't realize there were two different sides to felt and used the wrong side of the red felt so it's pilling up in some spots. As for the numbers, I looked at using stickers, iron ons, and even paint. I ended up finding a tub of adhesive foam letters on sale for 40% off (about $3-4) at Michael's. The foam letters stuck on the felt just fine but I dabbed on a little hot glue for a stronger hold and it worked like a charm.

    The pockets are 3"x3" so I made the ornaments around 2". Sometimes it was a little tricky working the little details but you just need to have patience and good lighting. I'm glad I got a chance to use up some of the felt sheets I stocked up on last month when it was on sale.

    Here are close-ups of the ornaments I spent so much time on.


    Felt Candy Cane, Reindeer, Holly Berry, Christmas Tree and Poinsettia (Set 1 out of 5):


    Felt Stockings (Daddy, Gabby & Mama), Bird and Star (Set 2 out of 5): The stockings open at the top so that you could insert a little treat or rolled up dollar bill.


    Felt Snowflake, Heart, Ornament, Gingerbread House, and Blingy Ornament (Set 3 out of 5):


    Felt Gingerbread Man, Music Note and Christmas Present Boxes (Set 4 out of 5):


    Felt Penguin, Santa Claus, Snowman, Hello Kitty and Brobee from Yo Gabba Gabba (Set 5 out of 5):


    At the age of two, Gabby doesn't really understand what Christmas is let alone the idea of counting down the days until Christmas. All she knows is that Santa is nice and not scary, trees decorated with lights and ornaments is "Christmas" and gingerbread man cookies are good. I have to put the calendar away each morning or else Brobee will end up under the table or Santa will be lost between the couch. My goal is to keep this intact and last until she goes off to college at least. I bet I'll have to replace missing ornaments along the way but it will give me an excuse to make some more.

    Friday, December 2, 2011

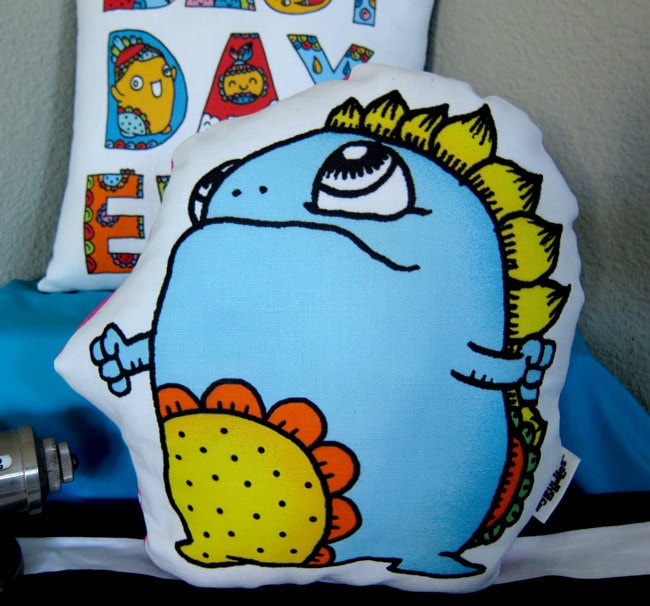
    Sponsor Highlight: My Buddles

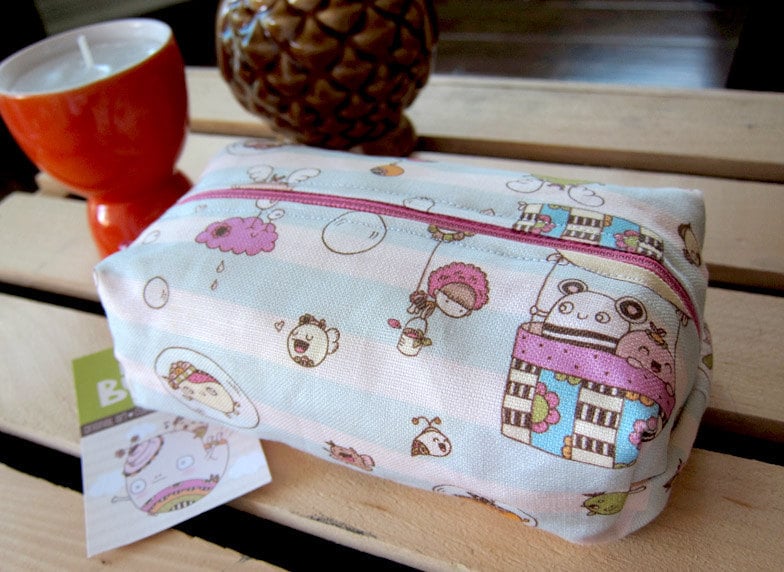
    I'm excited to introduce our newest sponsor, Jennifer from My Buddles. She is an amazing artist who draws cute and whimsical characters made of flowers and leaves. Her cute sayings and expressions are sure to brighten up your day.

     
    If you are looking for some stocking stuffers for Christmas, be sure to visit My Buddles on Etsy

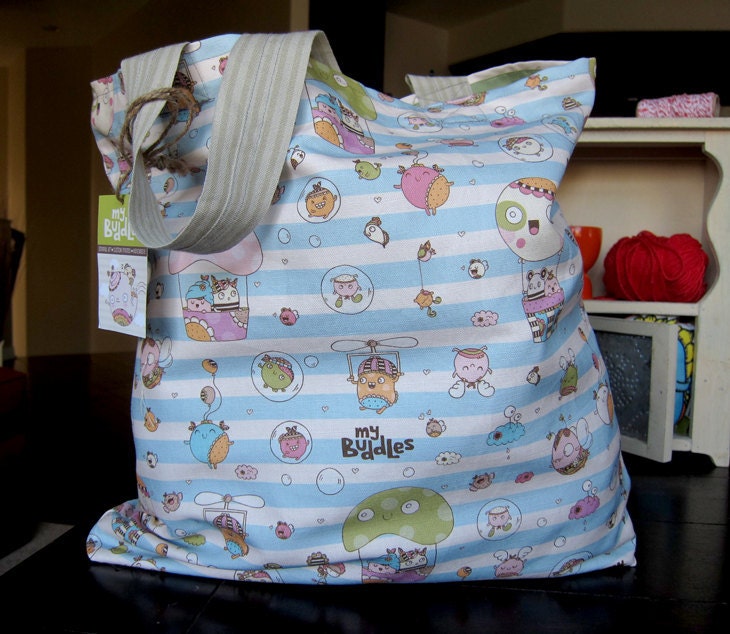
    Here are just a few of my favorite items from her Etsy shop.

    Plush Doll - I CAN DO IT!

    My Favorite One: Blue Striped Tote Bag:

    For more information about Jennifer and My Buddles, please visit http://mybuddles.blogspot.com/

    Thanks, Jennifer! Looking forward to seeing more items in your Etsy store. 

    Wednesday, November 30, 2011

    Thanksgiving Pilgrim and Indian Turkey Headband Hats

    Turkey Day is a big deal in our family. Right after Labor Day, we get a twinge of excitement for the upcoming holidays. We took over all the cooking from our moms years ago so that we can do a traditional American style feast as opposed to an Asian one. I'm not a cook at all but can do a juicy turkey. What I love about Thanksgiving is that the focus is on the food and family. No stress about buying and wrapping presents.

    With all the little babies this year, I put together some hand print turkey hats. Gabby loves getting her hand traced so she had fun helping me make this. I gave the turkey some lashes for fun. 

    Thanksgiving Pilgrim Turkey Headband Hat using Hand Prints:


    I prepared a bunch of turkey heads in advance wearing pilgrim and feather headbands. Before dinner, parents helped trace and cut out handprints to glue on a headband. It was a fun little activity while dinner is being setup.

    Indian and Pilgrim Turkey Heads:


    Completed Turkey Headbands (with some adult handprints too):


    Gabby Modeling Her Turkey Hat in Our Family Picture: